
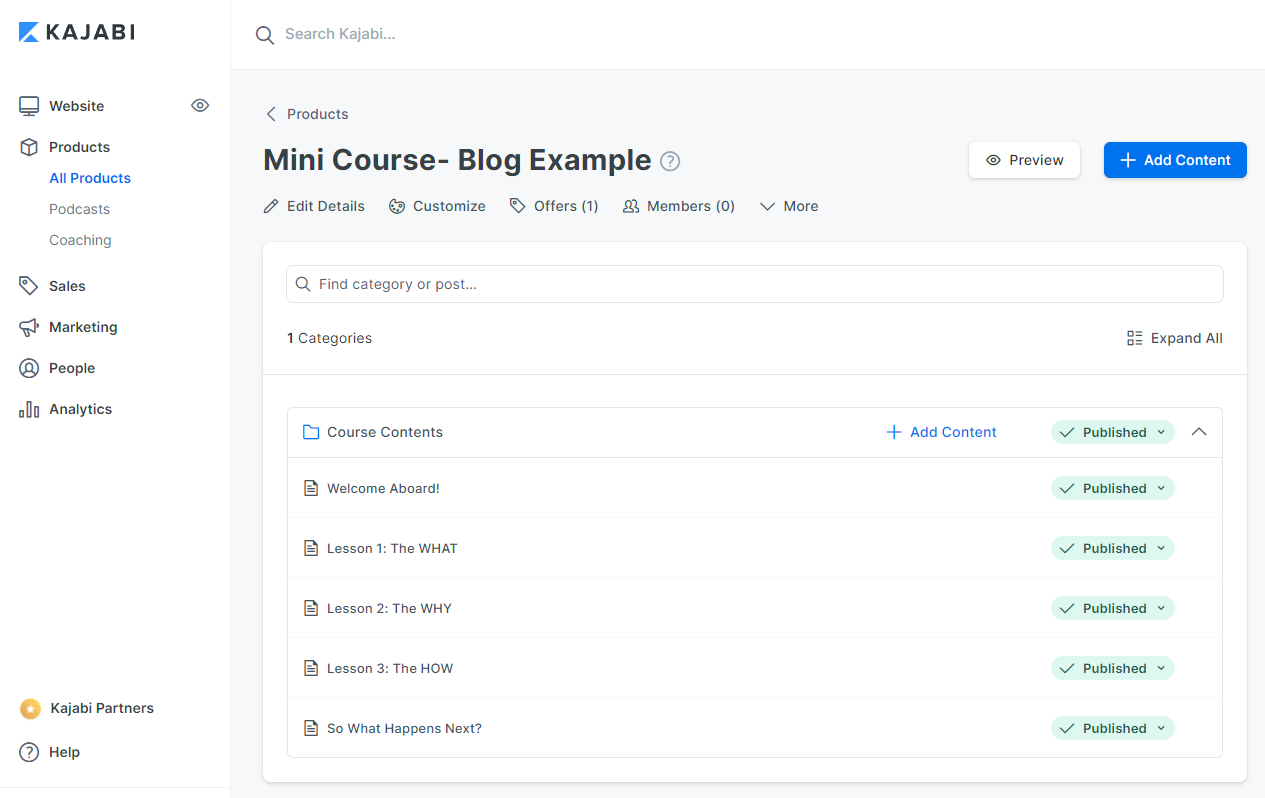
How to Presell Your Course in Kajabi
Oct 15, 2021Overview
If you’re ready to take your course online, Kajabi is a great way to reach your clients and customers early with a presale!
This post will show you how preselling your course in Kajabi can help transfer your leads into clients and get them more excited about investing in your services or products. As an online coach myself, I’ve had great success with this platform by taking advantage of all the tools Kajabi offers to presell my own course (sign up with Kajabi here)
This article is a step-by-step breakdown of the basic path to get ready to presell your course on Kajabi. The assets you will need to create are:
- Sales Page
- Offer Page
- Thank You Page
- Email Confirmation
- Course Outline (optional)
Step 1- Create A Sales Page
We all know that the first step of a successful online business is to attract and retain customers and clients. A sales page is just a single page with an offer to get people excited about the course, explain what they can expect from you, and includes a sense of urgency to act soon.
What you say on your sales page can either win more fans or lose them quickly. In simplest terms, it’s best to stick to the method taught by Dan Kennedy: Problem, Agitate, Solution.
The headline of your sales page should address your client’s problem or concern. Use the language that your customers use; you don’t need to get fancy here. Imagine someone is typing the question into Google, and your course is the first result— what would it say? Once you’ve addressed the problem, you need to agitate their concerns and remind them what the consequences of not having the problem solved could be. Finally, provide the solution! Talk about how your course solves the very problem your ideal customers are having and how it can help them succeed!
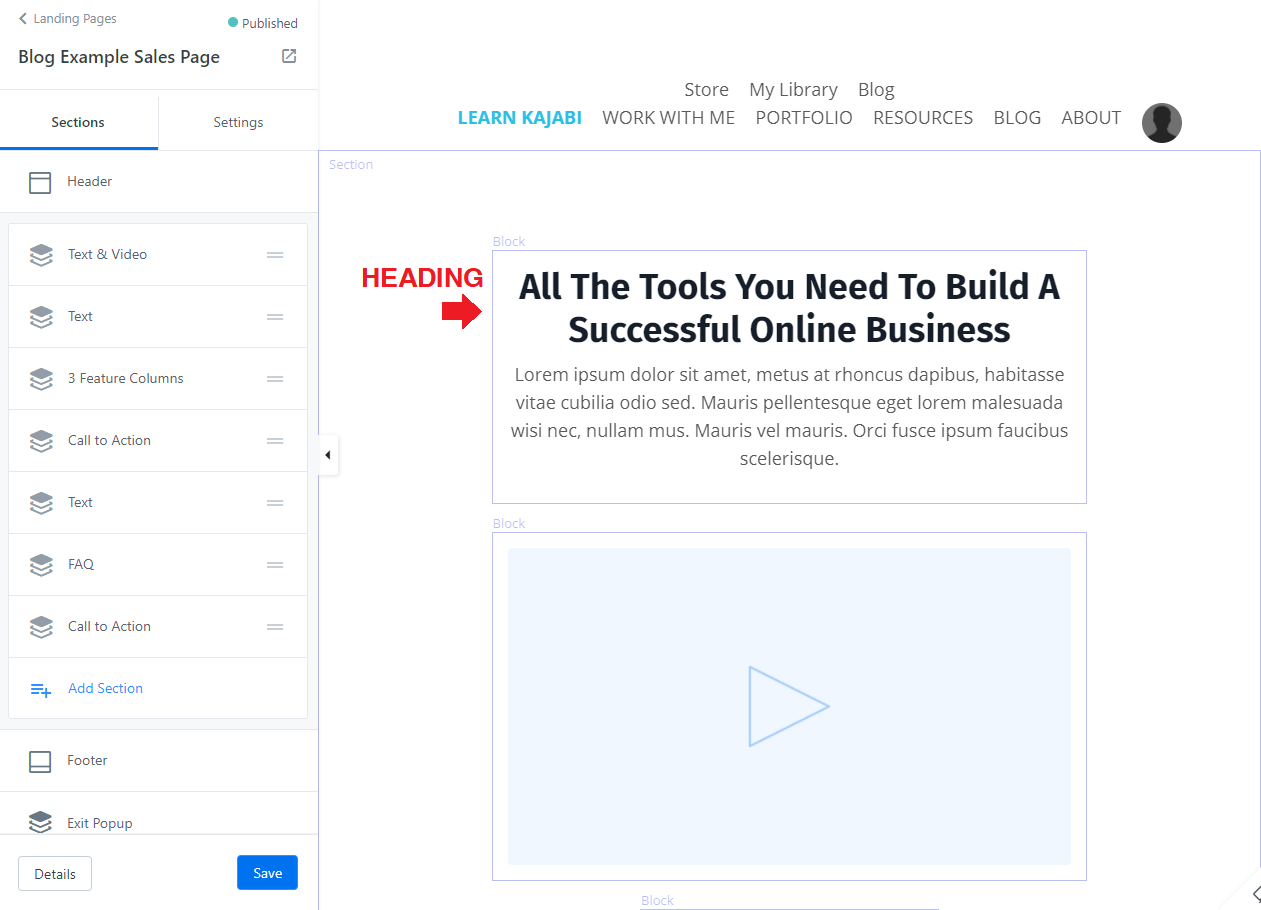
To create the page in Kajabi, click on the New Landing Page button in the Pages section under the Website heading on the left column.

You can choose to use a template from Kajabi or start from scratch. The first section you need is a heading. You’ll also need to set a start date and include a section with a countdown timer to let your potential customers know when they can expect access to the course. Tell them they need to register soon to lock in your special offer now.
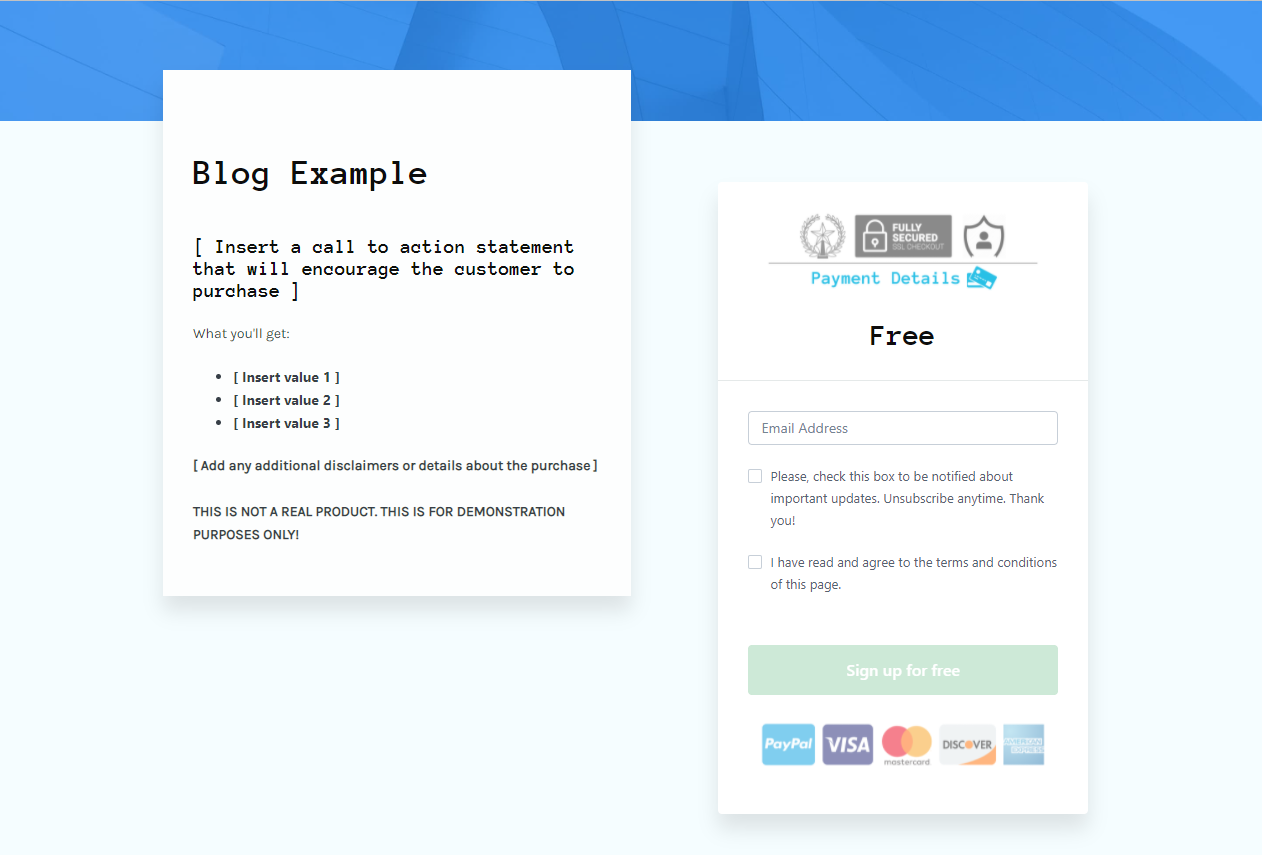
Step 2- Craft Your Offer
The Offer is essentially the checkout page for which you present the price and package of your course. Here you will summarize the best parts of the sales page and allow people to purchase the course.
One of the best ways to turn your leads into clients is by offering a free trial (or consultation) for your service before asking them to commit to you. This way you can start building trust by providing value first which can significantly increase conversions in the future. For example, as part of your offer, your customers can get a free 20-minute consultation if they sign up for the presale of your course. A money-back guarantee could help convert leads and establish confidence in your product. Ultimately, you need to craft an offer that’s unique to your customers, connects with them, and builds trust.
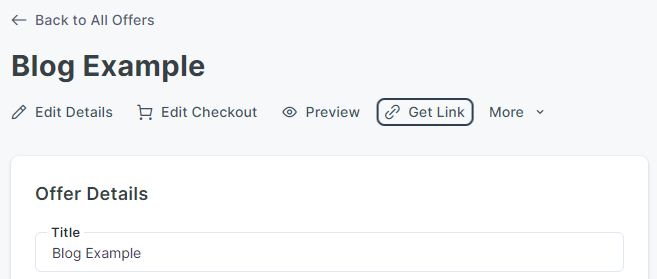
To make your offer, go to the Sales heading in Kajabi and click ”New Offer.” You will need a title and description for the offer. You also have the section to attach a product to the offer. Your product can be a course, membership, coaching program, or any of the other options Kajabi offers. Don’t worry if you don’t have a product ready at this time (see Step 8 below); these steps are just focused on getting you ready to presell the course.

Include all the details of what is included with the purchase of your course. You will need to make sure you capture their full name, email address, and payment info (if applicable).
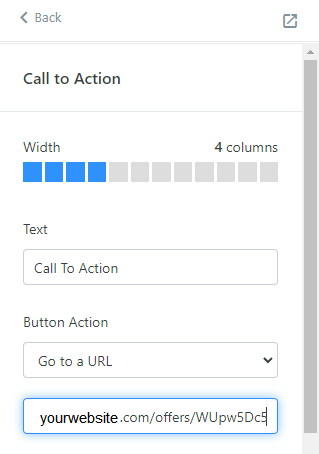
Once you have filled out the information for your offer, you will then attach the offer to your call-to-action button on your sales page. Simply click “Get Link” at the top of the page where you built your offer and copy the link.
Now go back to your sales page, and for each call-to-action button you have, paste the link to the offer. Or click from the drop-down on the “Checkout Page” and select your offer.
Step 3- Build a Custom Thank You Page
After the customer has completed filling out their information, they will be taken to a thank you page. You will have to create a custom thank you page that will outline what will happen next and when the course will become available to view.
A thank you page is an essential step of the customer journey. It provides confirmation for the customer that they’re officially registered. It also allows you to confirm any last-minute details.

To add a thank you page, go to the Websites heading, click Pages. You will then click on the button on the top right corner that says New Landing Page. Kajabi has a few templates you can choose from to customize your thank you page.
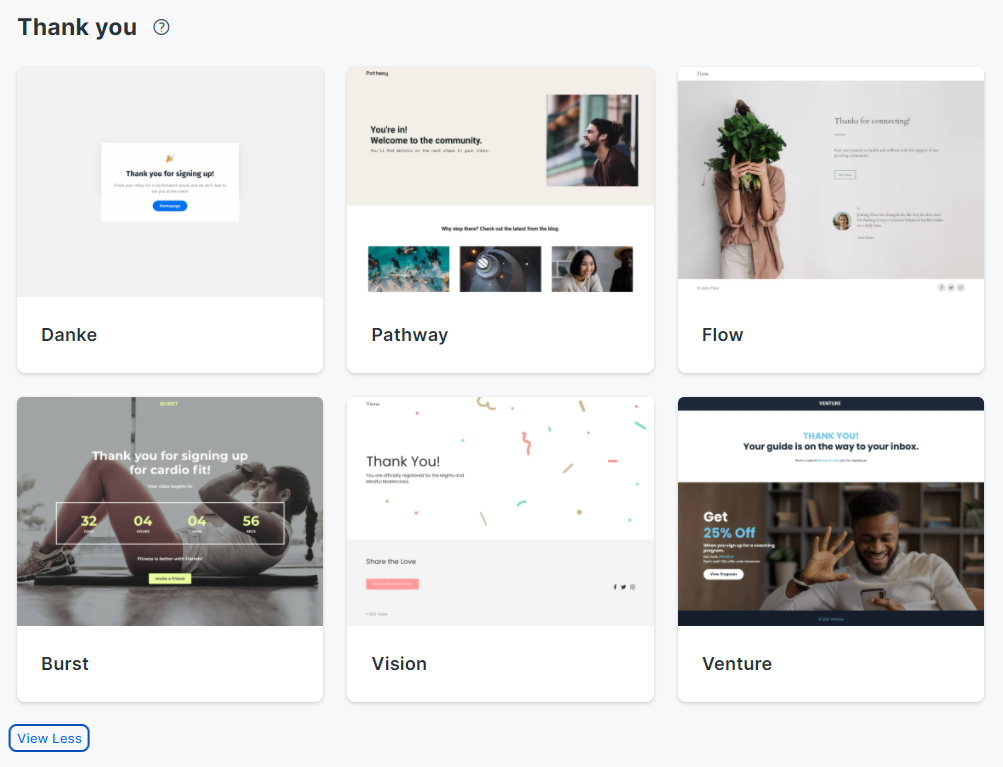
On your thank you page, you should include detailed steps on what is going to happen next. For example, your members should first look for the confirmation email, and then they need to pick a date to schedule their free consultation if that’s what you are offering as a bonus. Keep the next steps minimal and straightforward. Most importantly, you need to repeat when the course will be available for them to view!
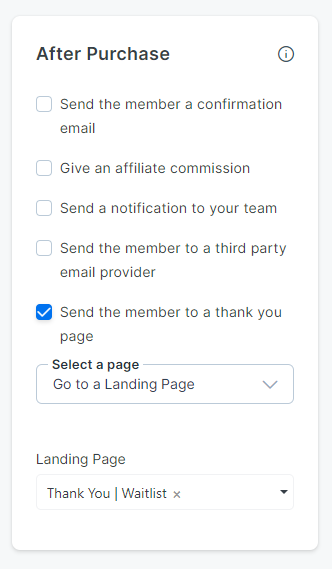
Step 4- Automate the After Purchase Flow
To complete the presale flow, you need to make sure after they purchase, they are automatically sent to the thank you page you just created. This is a simple routine that only takes a couple of clicks.
Go to your offer and then scroll down to the bottom and find the section called “After Purchase.” Here you will need to check the last box, “send the member to a thank you page.” For the select a page option, choose “Go to a Landing Page.” You just need to select the custom thank you page you created in step three.
Step 5- Design a Custom Email
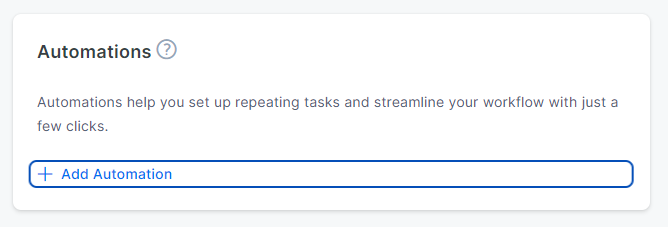
Automations are your new best friend! Kajabi offers complete integration of your sales pipeline into your email marketing. This means that not only can you track what customers purchased, but you can also have emails sent automatically! Automating your sales and emails in one platform is extremely valuable and saves you so much time in your marketing efforts.
To create a custom email and have it sent automatically after their purchase, go to your offer and scroll down to the section “Automations.” Next, click “Add Automation.
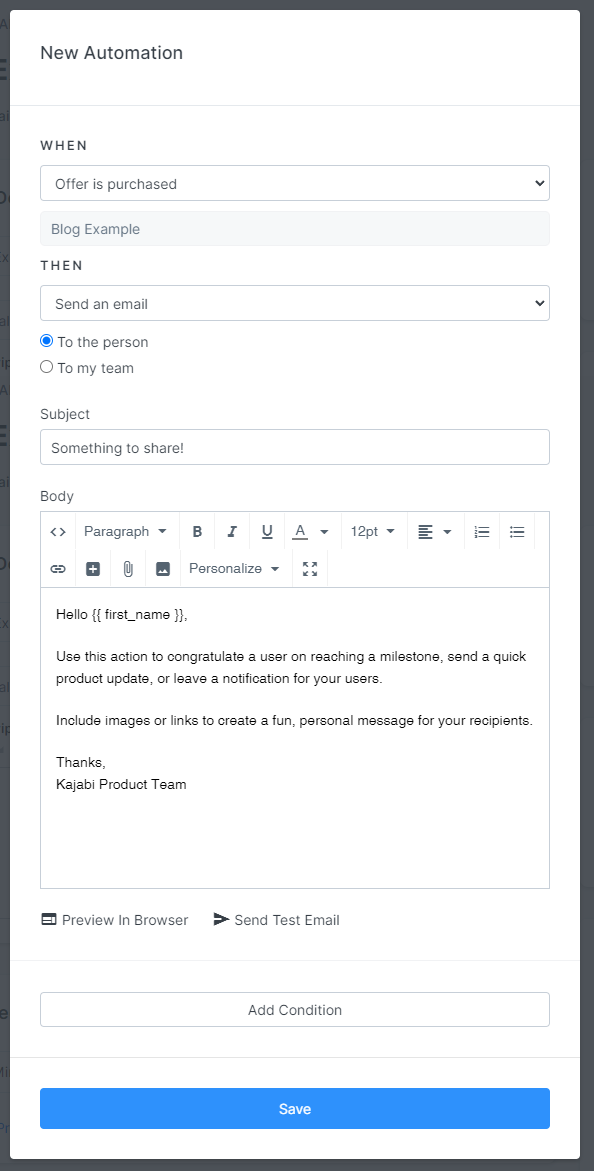
A new window will pop up, and this is where you craft your custom email. Change the first drop-down option to when “offer is purchased,” then the next drop-down option to “send an email.” Choose the radio button “to the person.”
After you have drafted the email and subject line, I recommend you send a test email to yourself to make sure everything looks good. Once you are happy with the email, click the save button at the bottom.
Step 6- Draft a Course Outline (optional)
If you have the time and resources to create an outline of your course, this would be the time to make one. The outline is a roadmap and syllabus for your students to preview what they can expect in your course. Having this information can help someone determine if your course is right for them. You can include this information on your sales page, offer page, or even in an email. Keep it simple and easy to navigate.
Step 7- Attach Your Product to the Offer (optional)
If you have a course ready (or at least the outline started), you can attach it to your offer and set a date for when your course becomes accessible.
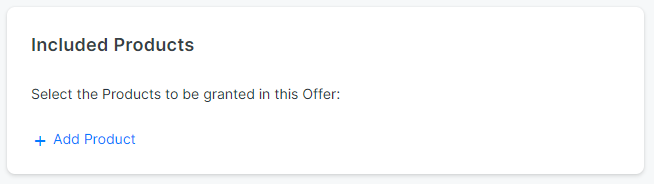
To attach your product (the course), go to the offer you created in step two. Scroll down to the section that says, “Included Products,” and click “Add Product.” Next, you will choose the name of the course you have created in step six.
Finally, and most importantly, you need to choose when the customer has access to your product. On your offer settings, scroll down to the section that says, “Product Access.” This date is when you want the course to go live. Make sure you are confident of the date. Students will have access beginning at the time you determine in the settings on the specified date (you can adjust the time zone in the settings).
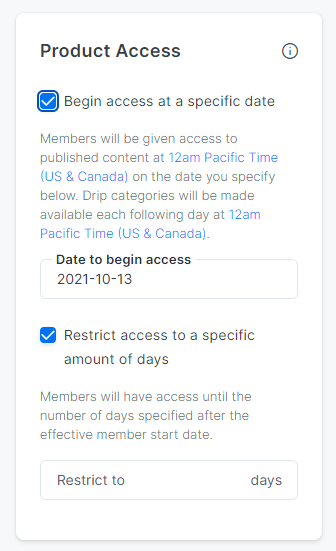
You can change the date later if you have to, but if you do, you will have to update your sales page, checkout page, thank you page, and email everyone who has already signed up. It’s a lot of work to change everything, so I don’t recommend it unless you absolutely must.
Step 8- Assign the Start Date and Access
If you are not attaching a product to your offer, you can always manually give access to it on the actual start date.
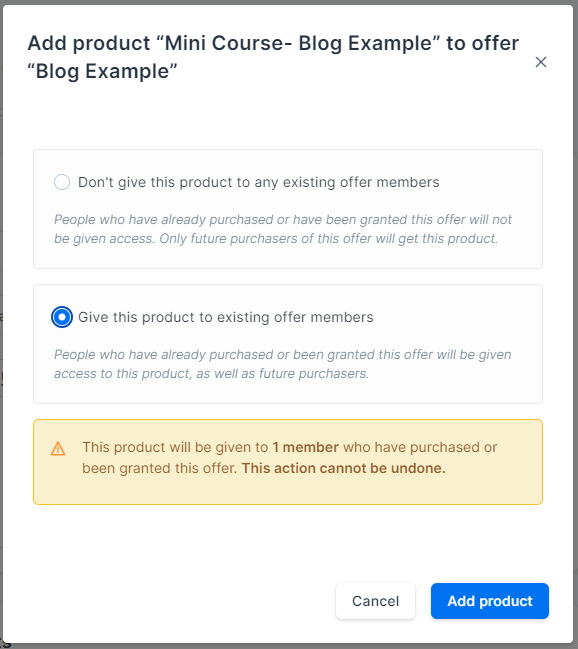
Since you set up the purchase to be an empty offer, you just need to give access to the product now. Go to the offer, click on “Included products,” and select which product you want to have in this offer. It’ll ask you if you want to give access to the product to those who have previously purchased this offer or only the new buyers. Select “give this product to existing offer members.”
If you need to do this in bulk, you can select all your contacts at once in the All People section and choose the bulk action “Grant Offer.” This method is best if they all were on the waitlist and you’re granting a free offer.
Step 9- Develop and Promote Your Course!
At this stage, you are all set up and ready to launch your presale for your course! The best use of your time at this stage is to either start (or keep working on) developing your course while promoting it to your audience. You can promote it through your social media, email your current list, or find others to promote it for you. Get creative!
Final Wrap-Up
That’s it! You have created a sales page with an offer to your product (the course), and it automatically sends them to a thank you page and a custom email!
The presale process is all about having your system streamlined, and Kajabi does it all! Kajabi handles the creation of landing pages, a full online course builder, and email marketing. If you want to read more about my thoughts on why Kajabi rocks, check out my previous post!
Affiliate Disclosure: This post contains affiliate links, and I earn from those qualifying purchases if you click the links. I only recommend tools and products that I personally use and trust!
Lead Magnet Essential Checklist
A vital 5 x 5 formula for creating your Lead Magnet to grow your email list and build a foundation for your future offers
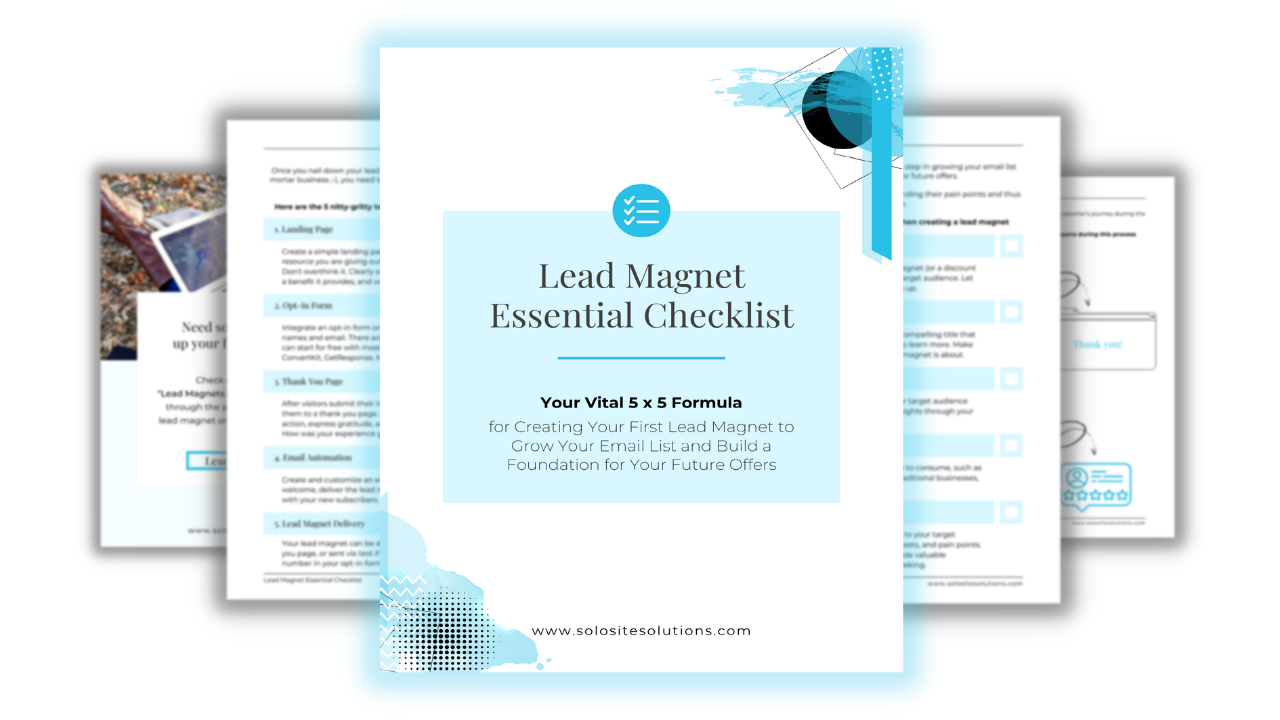
Grab this FREE checklist to create your first (or next) glamorous lead magnet and start building your email list while you sleep + learn 5 essential nitty-gritty tech pieces to have in place for a seamless lead onboarding process!
Just enter your information in the box and get instant access to the checklist download.
By submitting this form, you agree to receive this free checklist and be added to our mailing list for future communication. Your information is safe and will not be shared with a third party. Unsubscribe anytime.

